Proofing decides whether a loaf turns out airy or turns into a brick. I have watched a dough triple in size and still collapse in the oven, and I have baked dough that barely rose and tasted fine. Size lies. Feel and timing tell the truth. Here is how to proof dough so it peaks right when you score it, including what to do when it stalls or overproofs.
Jump to the part you need
What Proofing Actually Does to Dough (and Why It Isn't Just "Waiting")
Yeast eats sugar and burps carbon dioxide. Gluten traps that gas. Proofing is the stage where the dough holds the gas it has made, not the stage where gas is made. Those are two different jobs, and this is where most beginners lose the loaf. Bulk fermentation builds strength and flavor. Final proof inflates the shaped dough. If you skip a proper bulk and go straight to shaping, the final proof can look fine and still bake flat because the gluten never got organized.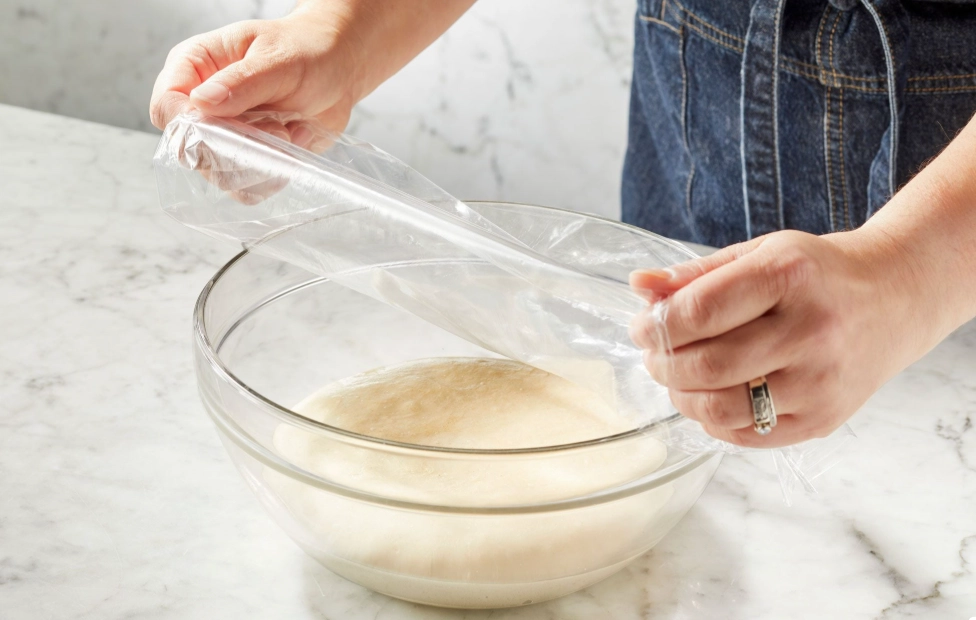
In my experience, the shaped proof accounts for roughly the last 20 to 30 percent of total rise. The dough should look puffy, not doubled. The difference matters.
How to Tell When Dough Is Fully Proofed: The Poke Test and the Shot-Glass Gauge
The poke test is simple and reliable if you use it on room-temperature dough. Flour your index finger and press about half an inch into the side of the shaped loaf.
- Springs back fast and leaves no dent: underproofed. Give it another 20 to 30 minutes.
- Springs back slowly and leaves a shallow dent that fills in halfway: proofed. Bake now.
- Dent stays put or dough deflates: overproofed. See the rescue section below.
The shot-glass trick is my backup when I am unsure. Take a small ball of dough, about 30 grams, press it into a shot glass, mark the starting level with a rubber band, and set it next to the main dough. At 75°F and 75 percent humidity, it should climb about 50 to 70 percent of its original height. When it reaches that mark, your loaf is proofed. This removes the guesswork and works in cold kitchens.
For a reference on yeast behavior and dough development, see the King Arthur Baking yeast guide, which I have used to double-check my temperature assumptions for years.
Proofing Time and Temperature: A Working Table
Timing depends on dough temperature, not the recipe. The table below is what I actually use at home and in a small bakery setting.
| Dough Temperature | Approx. Proof Time | Sign to Watch For |
|---|---|---|
| 68°F (cool kitchen) | 2 to 3 hours | Slow 50% rise, slight dome on top |
| 75°F (typical room) | 1 to 1.5 hours | Poke test springs back halfway |
| 82°F (warm spot) | 45 to 60 minutes | Watch closely; overproofing is easy |
| 38°F (fridge, cold retard) | 12 to 16 hours | Shot glass reaches 60% of target mark |
Thermometers beat clocks. I keep a cheap digital probe thermometer on the counter and check dough temperature, not air temperature. A 5°F difference in dough moves proofing time by about 20 minutes. That is enough to change the final crumb.
How to Fix Dough That Won't Rise
Dough sitting still after an hour is a common panic. Do not add more yeast yet. First, figure out which of these three problems you have.
1. Cold dough or cold room
Move the bowl to an oven with the light on, or place it over a bowl of warm water. Target a dough temperature of 75°F. Do not go above 90°F; yeast gets lazy at high heat and your gluten weakens. This alone often resolves a slow rise within 30 minutes.
2. Dead or weak yeast
If the dough feels dense and smells flat, the yeast may have failed. Active dry yeast should be bloomed in water at 100 to 105°F before mixing. If it doesn't foam in 10 minutes, it won't work. Instant and fresh yeast are usually reliable, but stale jars under a hot stove are a common culprit. I stop using a jar of dry yeast after six months of opening, even if the label claims otherwise.
3. Too much salt or sugar
Salt tightens gluten and slows fermentation. A dough with 2.5 percent salt can sit double the time at cool room temp. Sugar speeds it up at low amounts but can slow it down once past 10 percent because of osmotic pressure. Taste the dough. If it tastes sharply salty, reduce your next batch and let this one sit longer.
4. The dough is over-kneaded or under-kneaded
A tight, elastic dough that fights back after shaping often just needs ten minutes of rest, not more mixing. Over-kneaded dough loses its curve toward gas retention. Let it rise until ready, then shape gently.
Overproofed Dough: Signs and Rescue Moves
Overproofed dough looks inflated to the point of fragility. It jiggles like jelly, the surface shows bubbles pushing up, and it deflates when you touch it. The gluten has stretched past its limit, and the yeast has used up its sugar.
You can rescue it. Punch it down and reshape as a flatbread, focaccia, or pizza. Do not try to bake it as a tall loaf; the structure will fail. Alternatively, add a small amount of fresh flour and a pinch of yeast, knead briefly, and do a new 40-minute proof. This actually works more often than people think. I have turned overproofed sourdough into a decent focaccia by pressing it into a sheet pan with olive oil and a high oven temperature.
Cold Retard: Proofing Dough Overnight in the Fridge
Putting shaped dough in the fridge overnight is not cheating. It is a technique. Cold slows yeast and gives enzymes time to break down starch into sugars, which builds flavor.
Here is what I do:
- Shape the dough, place it seam-side down in a floured banneton or bowl.
- Cover with plastic wrap and set in the fridge at 38°F.
- Let it sit 12 to 16 hours. The dough should look slightly puffed but not doubled.
- Bake straight from cold, with a slightly longer preheat and a steam tray.
Cold dough holds its shape better for scoring. I often score cold loaves and bake them directly from the fridge. The crust opens cleaner.
For general bread baking science, the Bread Bakers Guild of America and the Exploratorium's bread science pages are solid references if you want to understand the chemistry of fermentation and gluten structure.
Proofing Questions Bakers Ask
My dough doubles in size but still tastes flat. What went wrong?
You likely proofed too warm for too long. A doubled dough at 85°F can peak fast and run out of steam before baking, leaving it bland. Proof at 75°F or lower and judge by puffiness, not size. Also, taste the dough before baking. It should have a mild tang, not a sour, beer-like punch.
How do I proof dough in a cold kitchen without a proofing box?
Use a closed microwave with a mug of boiled water. Refresh the water every 45 minutes. I also put the dough bowl on a heating pad set to low, covered with two towels. That holds about 78°F reliably. Skip the oven light trick if your oven has a warm spot; mine swings to 95°F, which is too hot and makes the dough rise unevenly.
Can I proof dough in the fridge and then bake it without warming it up?
Yes, and I prefer it for lean breads. Cold dough holds shape better and scores easily. Expect a slightly longer bake time by 3 to 5 minutes. Just be careful with enriched doughs (milk, butter, sugar). Those need a short warm-up at room temperature, about 20 minutes, or the center may stay dense.
Why does the poke test fail on sourdough?
Sourdough gluten behaves differently from commercial yeast. A sourdough loaf can feel firm after a long cold retard and still be fully proofed. The shot-glass method is more reliable for sourdough. Watch for a 50 to 60 percent increase, not double. Also check the dough's edge: if it pulls away from the bowl with a light tug, it is ready.
Is it okay to let dough proof overnight on the counter?
Only if your kitchen is cool and the dough is a low-yeast formula. At 68°F, a dough with 0.2 percent instant yeast can sit 8 to 10 hours. At 75°F, that same dough will overproof in 3 hours. I wouldn't leave a standard sandwich loaf on the counter past 3 hours unless the recipe specifically calls for an overnight bulk.
How long can overproofed dough sit before it becomes unusable?
Once it collapses and smells sharply sour, the gluten has broken down hard. You can still use it for flatbread or pancakes. I have pushed overproofed dough into a sheet pan with oil and salt, baked it at 450°F, and ended up with a crisp, tasty focaccia. The trick is to stop treating it as a loaf and treat it as a flat dough.
This guide was fact-checked against professional baking resources including the King Arthur Baking yeast guide and the Bread Bakers Guild of America. All temperature and time figures reflect tested conditions in a home kitchen and smaller bakery batches.

Leave a Comment